Pygments, an external Python-based program. I installed Pygments through pip install, not realizing that Arch has it provided under its package manager called
[2] pygmentize.
JavaScript libraries instead.
ranger which is based on python as my file manager, it takes a few seconds for files to be previewed because it needs to display the syntax coloring as appeared in the image below. Without pygmentize installed, it straight away previews them on the rightmost column but all in a plain white color.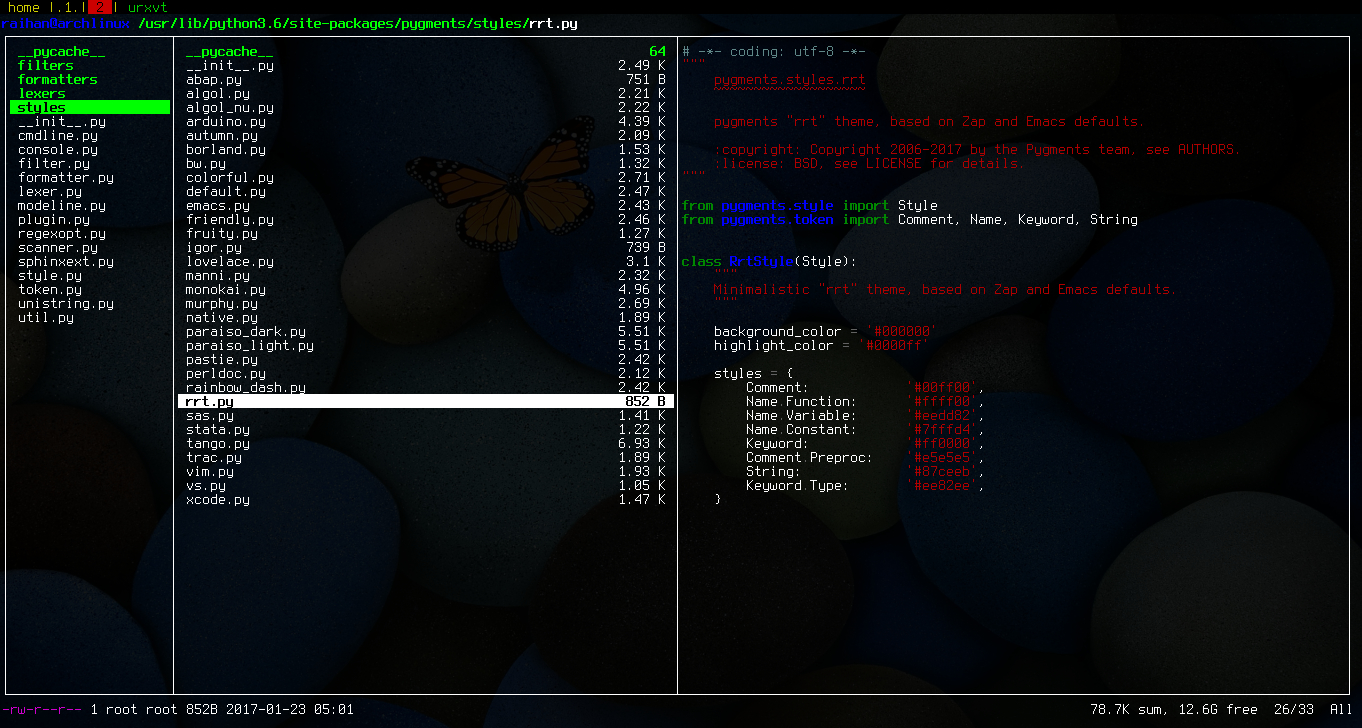
Prism.js. It supports 121 languages and line numbers are made available through a plugin too. However, I noticed that a few line numbers from the bottom were missing in every file containing codes. The numbers missing were random so I guessed it depends on the length of the codes written. I was quite disturbed by it so I looked for many ways that perhaps could fix it but the problem still persisted. Thus, I decided to try out Highlight.js.
Highlight.js is super easy to set up. Just follow the installation instruction as described either in its [official website] or in [Hugo documentation] and voilà, it just works. In fact, I needed not to do any extra tweaking because the [Blackburn] theme I am using for my blog has already included it as its main syntax highlighter. This js library by far has the largest number of languages supported and even though it does not support line numbers, I was happy enough with it until I realized that I have this *nvim* configuration file with long lines queuing and when I viewed it from my mobile phone, scrolled down to the bottom and scrolled back up to the top, it caused the screen to freeze.
Prism.js. I tested out whether or not the same problem as to what I was facing while running the highlight.js would occur by viewing the same file in the browser from my mobile phone. The result was good! Scrolling up and down actions did not at all lead to a frozen screen.
trial and error to make it work. When I googled "clipboard button on hugo", the results returned the following first three URLs:-
clipboard.js & is only applicable to an app which I neither have an idea what it is for nor what it is all about ;JS section and pasted it to a, let's say copy.js file and saved it in /static/js directory.
I skipped the CSS part and copied the following codes to the header template (header.html) located in /layouts/partials directory:
<link href='https://fonts.googleapis.com/css?family=Oswald' rel='stylesheet' type='text/css'>
<script src="https://ajax.googleapis.com/ajax/libs/jquery/1.11.1/jquery.min.js"></script>
<script src="/js/copy.js"></script>perl codes (let's save it as hello-perl.md) and assigned a copy button as well as a 'clip' id attribute to the <pre> tag:
<button onclick="copyToClipboard('#clip')">Copy to Clipboard</button>

<pre id="clip" class="line-numbers"><code class="language-perl"># Prints the message using two different delimeters.
print "Hello, world!\n";
print qq=Did you say "Hello?"\n=;
</code></pre>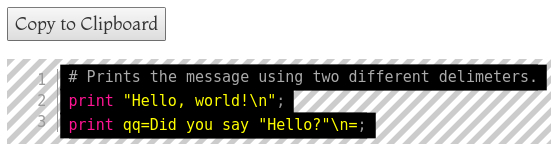
Notice the “copyToClipboard(’#clip’)" assigned to the button onclick and the <pre id=“clip”> placed in the hello-perl.md file. It simply means that a bookmark (served as a target area) with the ‘clip’ id attribute is created for the <pre> tag and so the button will then function to copy all the codes placed after by the same bookmark.
Here comes the ugly outcome of clicking the Copy to Clipboard button and having the copied contents pasted into an empty file using my nvim editor:-
# Prints the message using two different delimeters.print "Hello, world!\n";print qq=Did you say "Hello?"\n=;CopyIt did not preserve the original layout of the written codes where they got pasted in a continuous mode. Imagine there are 100 lines of codes to be copied, it will take a lot of work to correct the spaces.
clipboard.js library as described in the [2nd URL]. I downloaded the zip file and included the extracted script as well as had it instantiated by putting the following lines into the header template, substituting the initial included scripts provided by CodePen above:-
<!-- clipboard-button-->
<script src="/js/clipboard.min.js"></script>

<script>
new Clipboard('.btn');
</script>hello-perl.md file, I replaced the button onclick line with this,
<button class="btn" data-clipboard-target="#clip">Copy to Clipboard</button>Copied!" when the button is clicked. For this, I found out that I would need jquery and bootstrap.
jquery & [6] bootstrap and extracted them to the same /static/js directory. Thanks to this discussion, I was able to get it done successfully by having these lines placed into a separate *.html file (let's create it as a partial template by the name of copy.html and park it in the /layouts/partials directory). <link href="/css/bootstrap.min.css" type="text/css" rel="stylesheet"/>
<script src="/js/jquery.min.js"></script>
<script src="/js/clipboard.min.js"></script>
<script src="/js/bootstrap.min.js"></script>
<script>
// Tooltip
$('.btn').ready(function(){
$('[data-toggle="tooltip"]').tooltip();
});
$('.btn').tooltip({
trigger: 'click',
});
function setTooltip(message) {
//$('.btn').tooltip('hide')
$('.btn').tooltip('show')
.attr('data-original-title', message)
.tooltip('show');
}
function hideTooltip() {
setTimeout(function() {
$('.btn').tooltip('hide');
}, 2000);
}
// Clipboard
var clipboard = new Clipboard('.btn');
clipboard.on('success', function(e) {
setTooltip('Copied!');
hideTooltip();
});
clipboard.on('error', function(e) {
setTooltip('Failed!');
hideTooltip();
});
</script>partial call to include the above copy.html template in the header template by adding the following line into it:
{{ partial "copy.html" . }}hello-perl.md file to have these lines filled in as replacement to the previous copy button created:
<button class="btn btn-default" data-clipboard-target="#clip" data-placement="bottom" data-toggle="tooltip" title="Copy to Clipboard" button type="button">
  <img src="/img/clippy.svg" width="15">
</button>copy button (in the form of icon| [8] scroll down to the bottom for a demo), there is a tooltip displaying "Copy to Clipboard" and when I clicked the button, it pops up "Copied!" for a successful copying job.
Pygments for Syntax Highlighting. It supports over 300 languages, can display line numbers without any issues and the scrolling actions when viewing files containing a bunch of coding lines from a mobile device appear to be smooth too.
The difference is in order for the copy to clipboard function to work, changes have to be made to the way we assign a bookmark to the <pre> tag, because syntax highlighting works by a different approach where it uses the in-built shortcode called highlight.
So, as opposed to the client-side JavaScript libraries where a bookmark is added to the <pre> tag, we will now have it applied to the <div> tag like the following example:
<script src="/js/jquery.min.js"></script>
<script src="/js/clipboard.min.js"></script>

<script>

// Clipboard

new ClipboardJS('.main');

var copyCode = new ClipboardJS('.main', {
target: function(trigger) {
return trigger.previousElementSibling;
}
});

copyCode.on('success', function(event) {
    event.clearSelection();
    event.trigger.textContent = 'COPIED!';
    window.setTimeout(function() {
        event.trigger.textContent = 'COPY';
    }, 1000);
});

copyCode.on('error', function(event) {
    event.trigger.textContent = 'Press "Ctrl + C" to copy';
    window.setTimeout(function() {
        event.trigger.textContent = 'COPY';
    }, 1000);
});

</script>
<br>
<button class="main" data-clipboard-target="#clip">
COPY
</button>
<div id="clip">
# Prints the message using two different delimeters.
print "Hello, world!\n";
print qq=Did you say "Hello?"\n=;
</div>/* CUSTOM CSS */
button.main {
opacity: 0.8;
font-size: 0.7em;
background: #000;
color: #fff;
border: 2px solid grey;
padding: 2px 2px 0px 3px;
border-radius: 5px;
float: right;
overflow: hidden;
}copy button below (I have the button floated on the right with CSS). Note though that with Pygments in use, the copy to clipboard function lets the line numbers copied as well, which is something we do not want. Thus, it has its cons however, should we need the line numbers displayed, it at least shows the complete line numbers.
1# Prints the message using two different delimeters.
2print "Hello, world!\n";
3print qq=Did you say "Hello?"\n=;