How to Resize A LVM Partition Without Losing Data With Gdisk
An Alternative to Parted/Gparted
As mentioned in my previous (Archived) entry, I am writing this post to explain how to resize a partition without losing any data with
gdisk. By this, I mean resizing the physical partition itself, not the physical volume.- Boot the
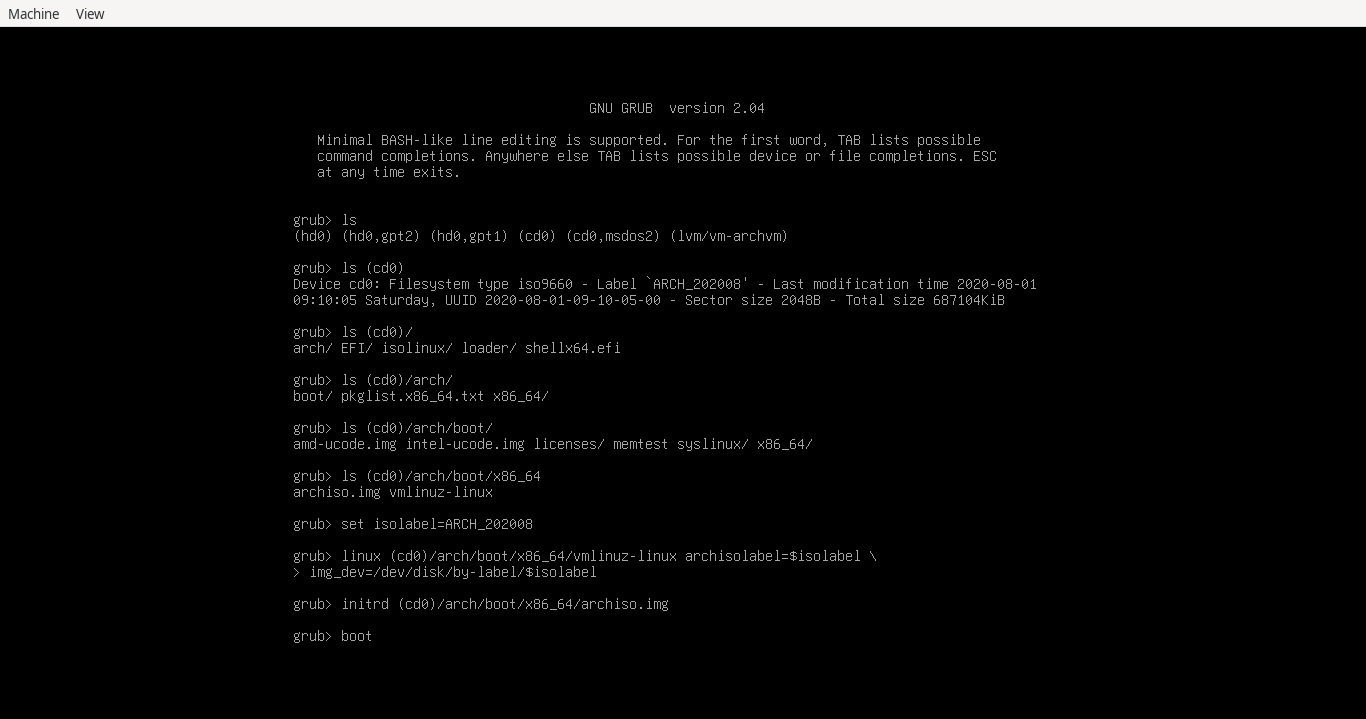
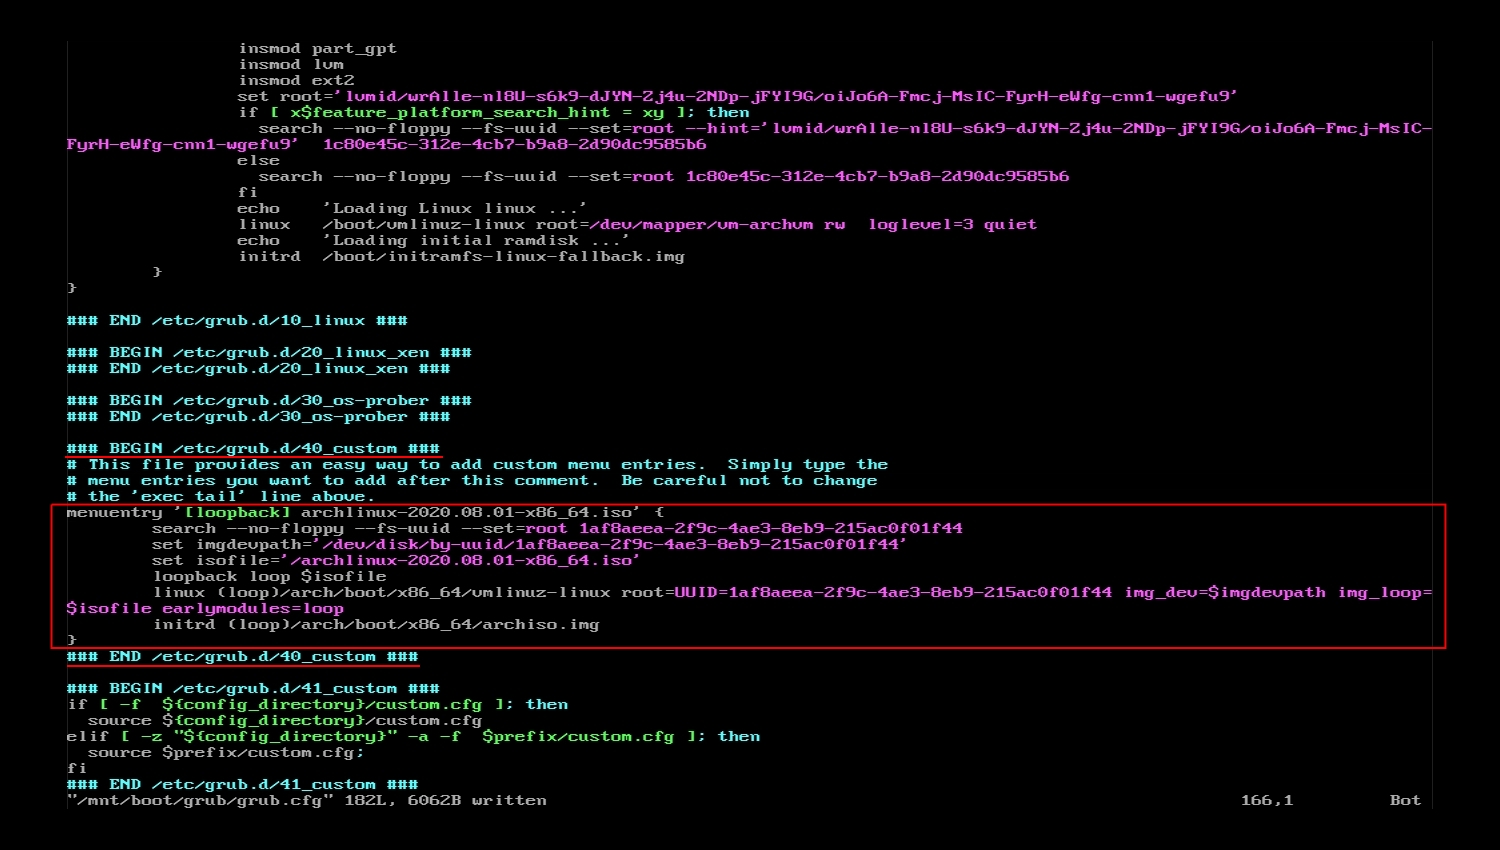
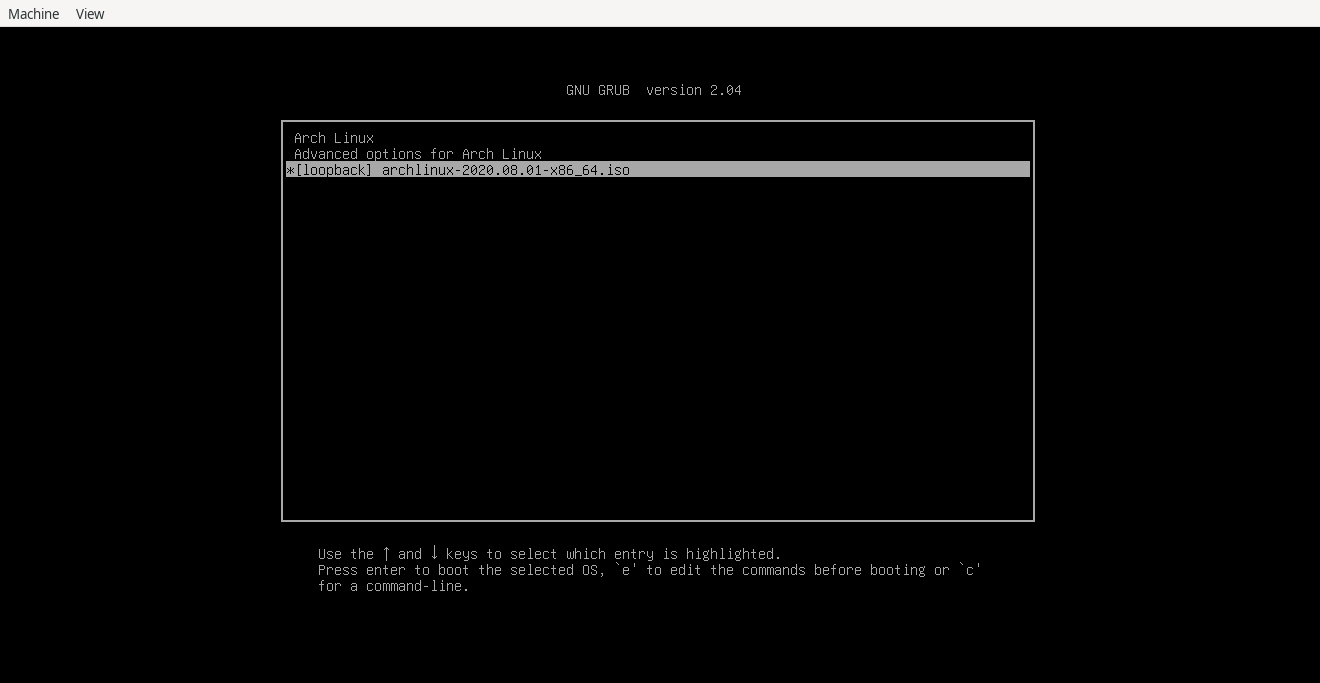
archisoon the VM with QEMU. If you have installed grub on ESP partition, chances are you will be dropped to the installed grub bootloader as shown in [this image] instead of the one that comes with the archiso. In this case, press 'c' for a command-line and run commands as indicated in the image below in order to be able to boot into it:- - Heads-Up: Do take note that I am
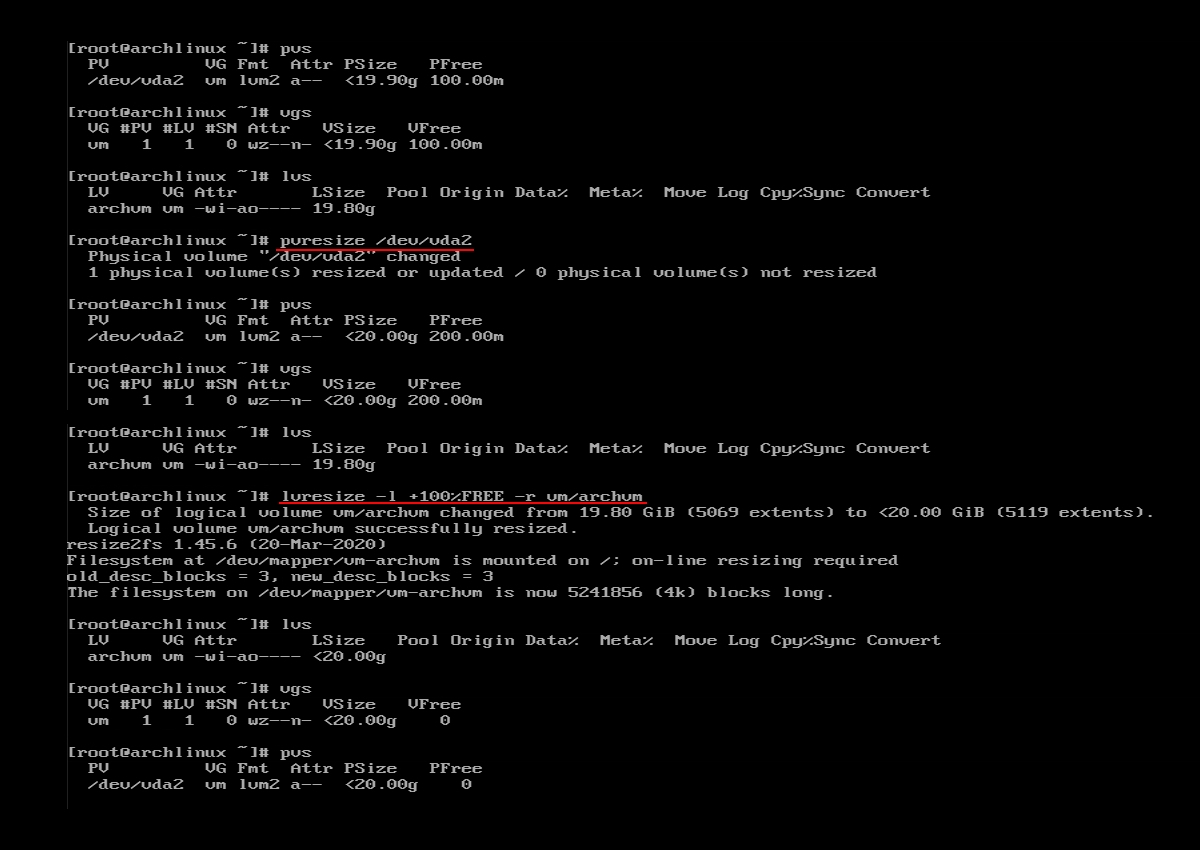
shrinkingmy physical partition. Should there be a need for you toenlargeyour physical partition, the order of the steps will be in the reverse/opposite sequence. In that case, you have to resize the involved partition withgdiskfirst, followed bypvresizeand lastlylvresize.
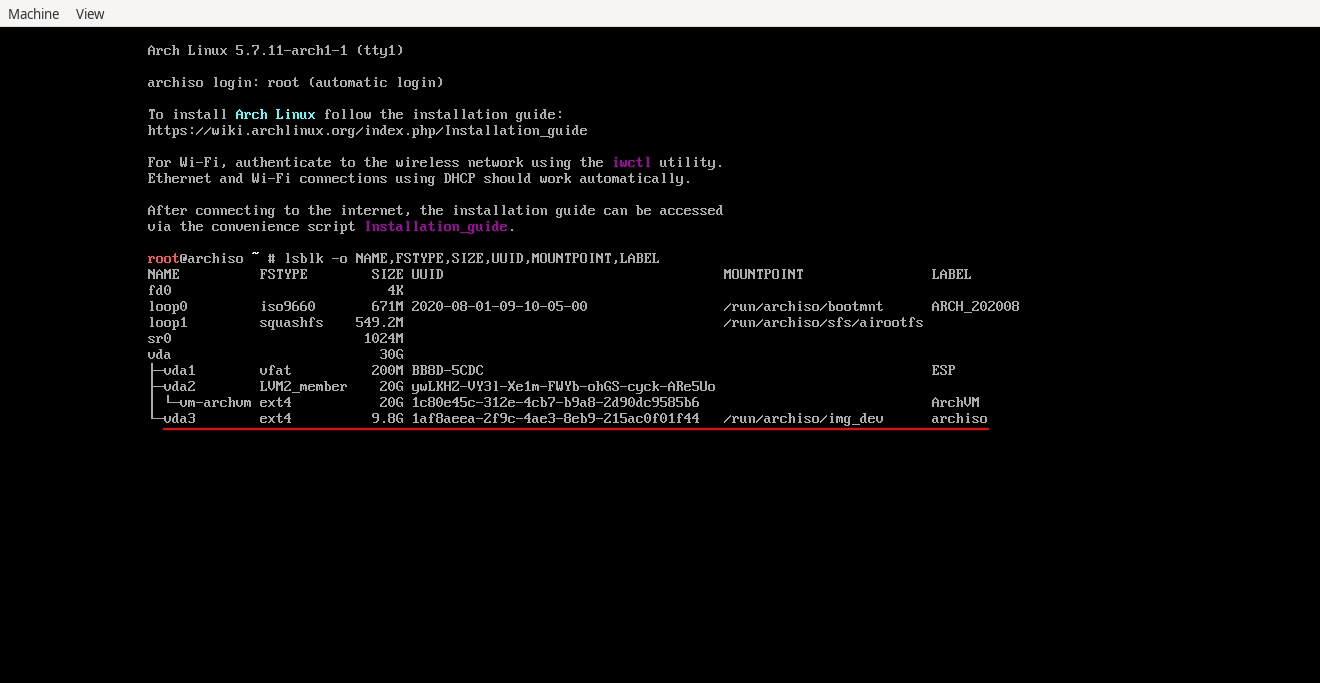
Please ensure that the file system is unmounted (in this case it would be theLogical Volumecontaining the/partition). One way to know is by running 'lsblk' command. It will list information about all available block devices including theMOUNTPOINTof those devices. IfMOUNTPOINTreturns no output for the device, that means it is not mounted.
First, resize theLogical Volumeand its file system all at once (with '-r' option) by running this command:lvresize -L new-size -r vgname>/lvname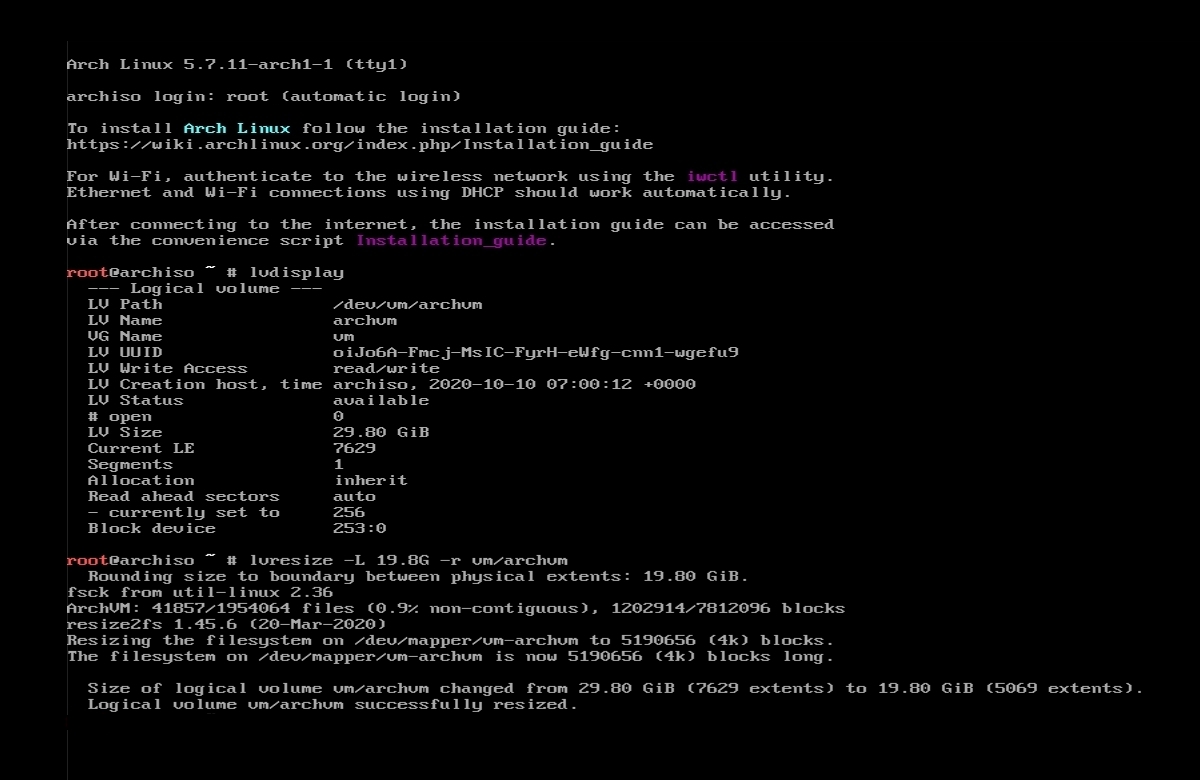
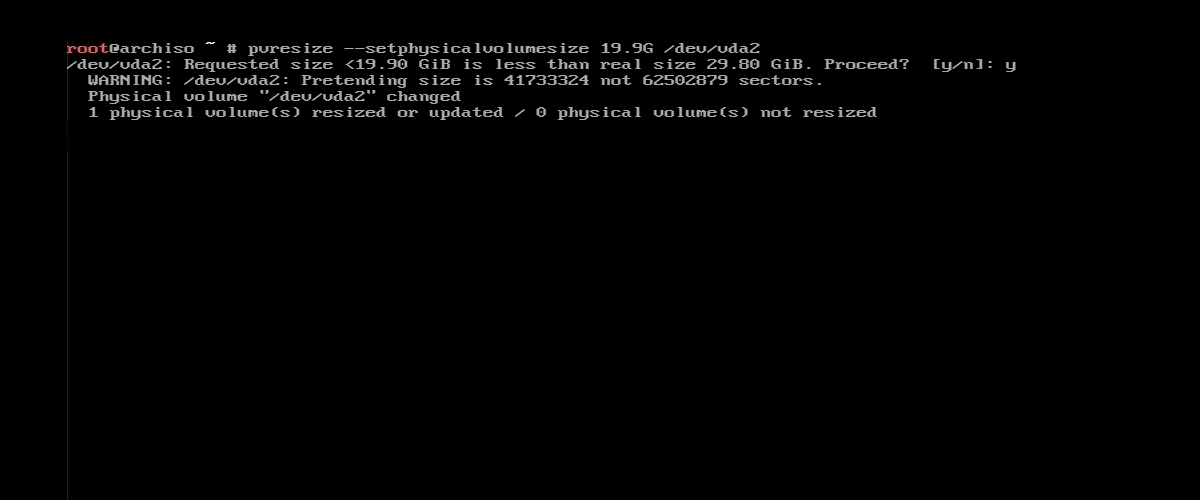
- Next, run
pvresizewith the below command:-The new size of thepvresize --setphysicalvolumesize new-size /dev/vdaXPVis advisable to be slightly bigger than the shrunkenLV'sotherwise it may prompt you an error. - And then, run '
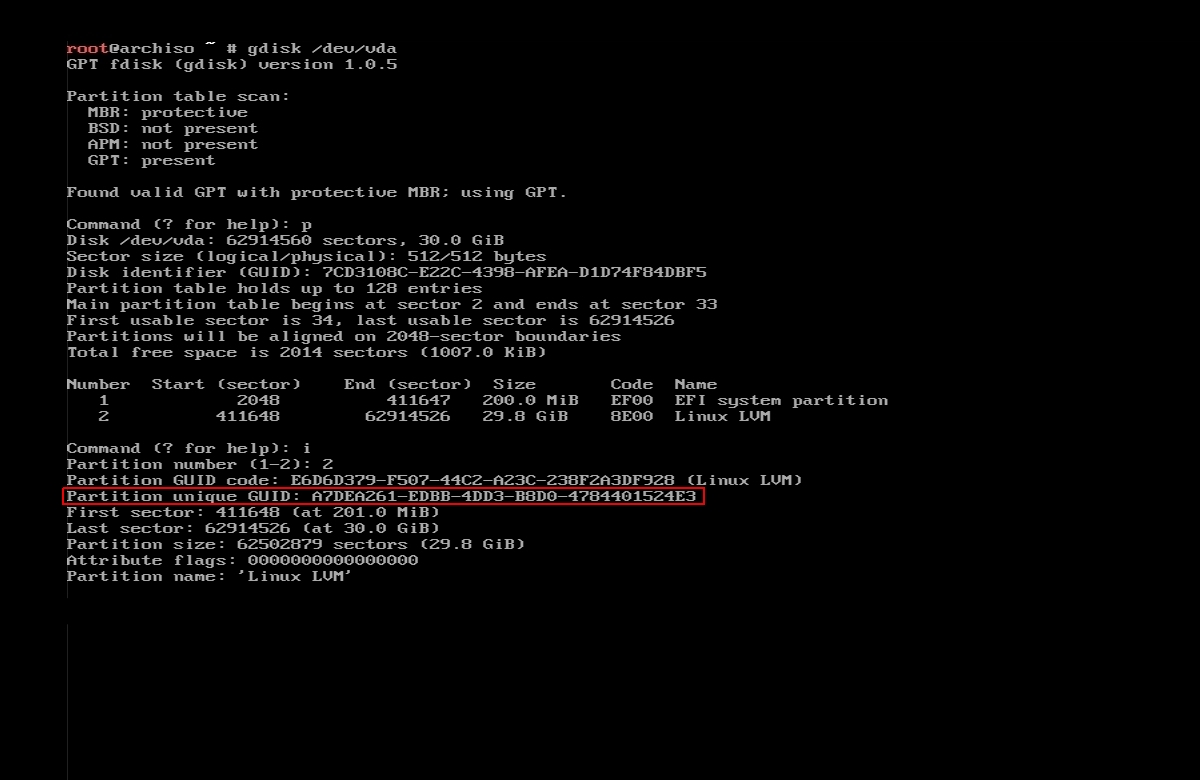
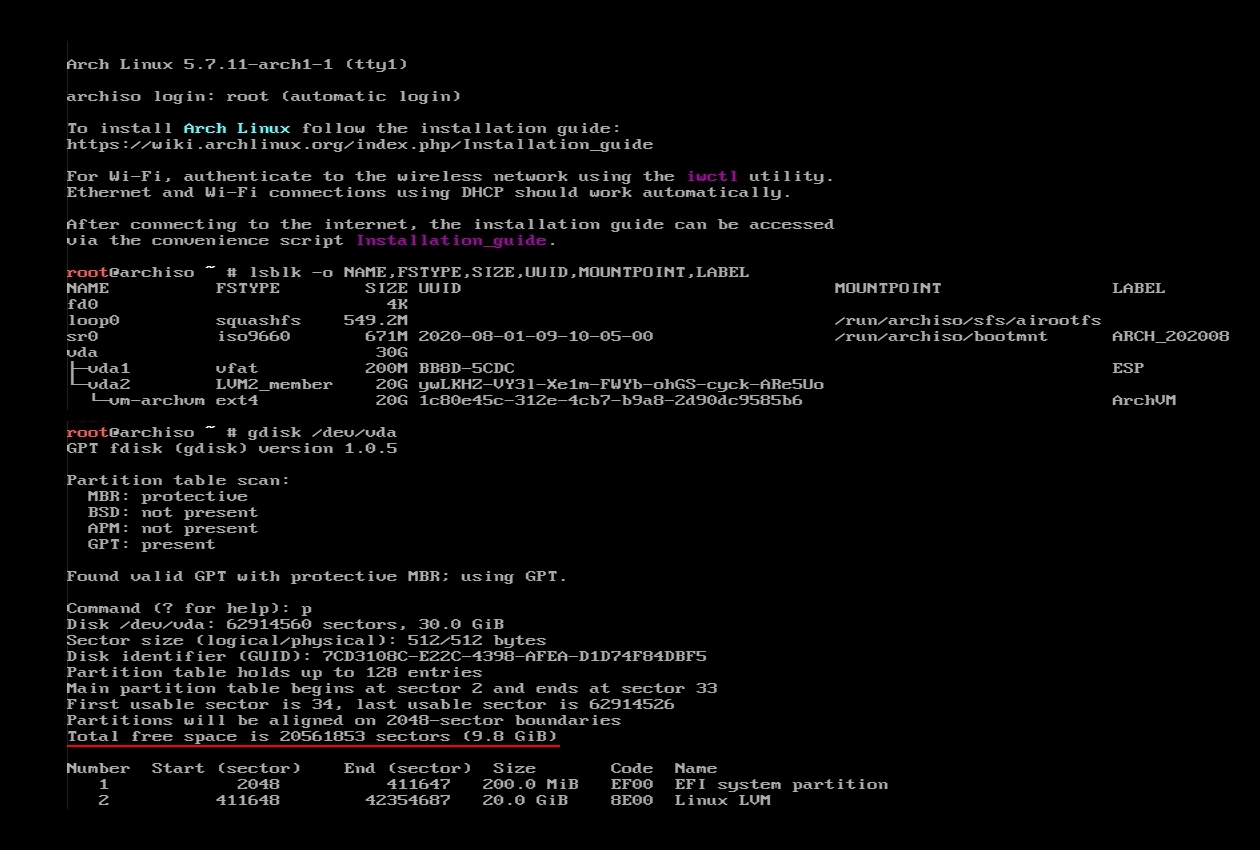
gdisk /dev/vda', enter 'p' to print the partition table, and enter 'i' to obtain the information of the partition that we want to resize where we will take note of itsPartition unique GUID. - After that, enter '
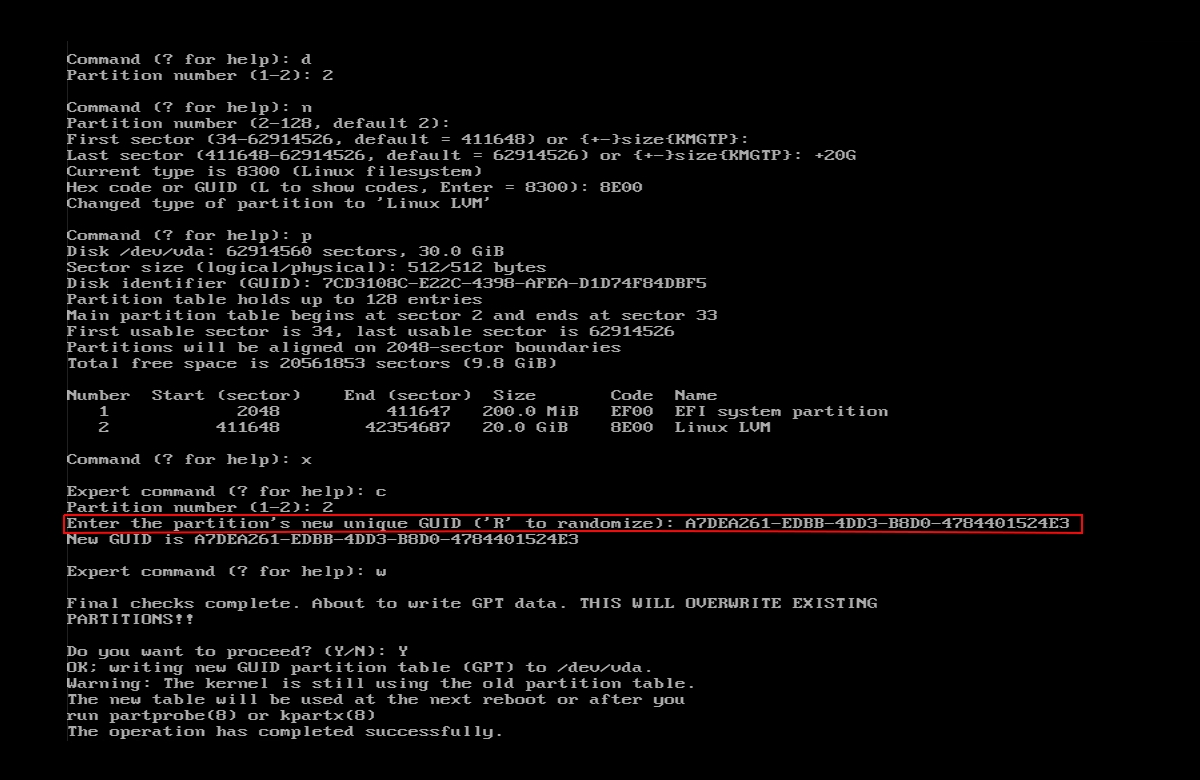
d' and the number of the partition we want to delete. Create a new partition by entering 'n', enter a new size which I recommend being slightly bigger than the resizedPhysical Volume'sand change the type of partition toLinux LVM(8e00) which is of the same type to the previous partition prior to deletion. Enter 'x' for expert command followed by letter 'c' to key in thepartition's unique GUIDwhich we took note of previously. Be careful with this action and ensure that the unique GUID is identical before writing the changes or otherwise you may encounter data loss. - Reboot and see if the installed Arch system is booting successfully after the shrinking process.
Well, actually! There is an easier way to have this exact purpose done without all these hassles (with the exception of
lvresize and pvresize. They are still required to be done before you execute the task with any partitioning tool of your choice, if you are shrinking it).Use parted or Gparted!
I however, prefer
gdisk over these two partitioning tools due to:too much typing when usingpartedand the way the sizing is managed is just complicated. Or maybe it's just me who wants to think so.- a lengthy time of progress it takes when resizing a large partition by using
Gparted.
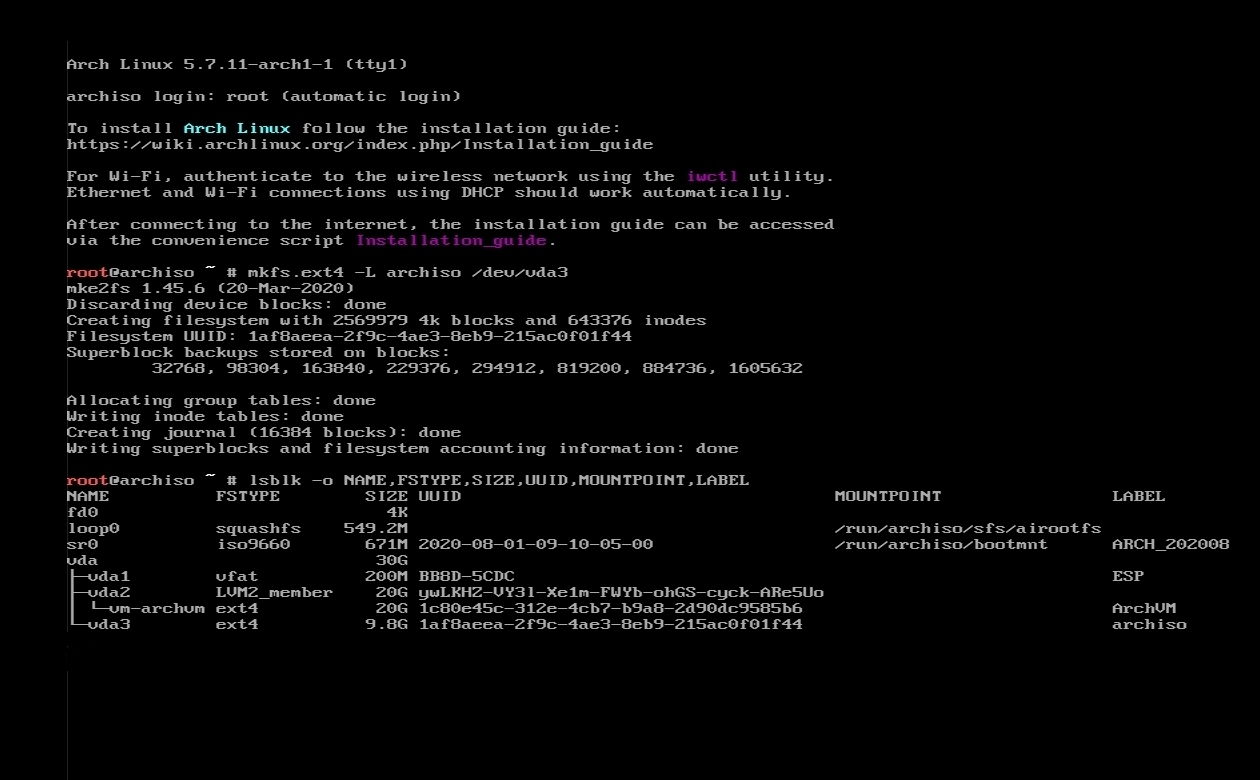
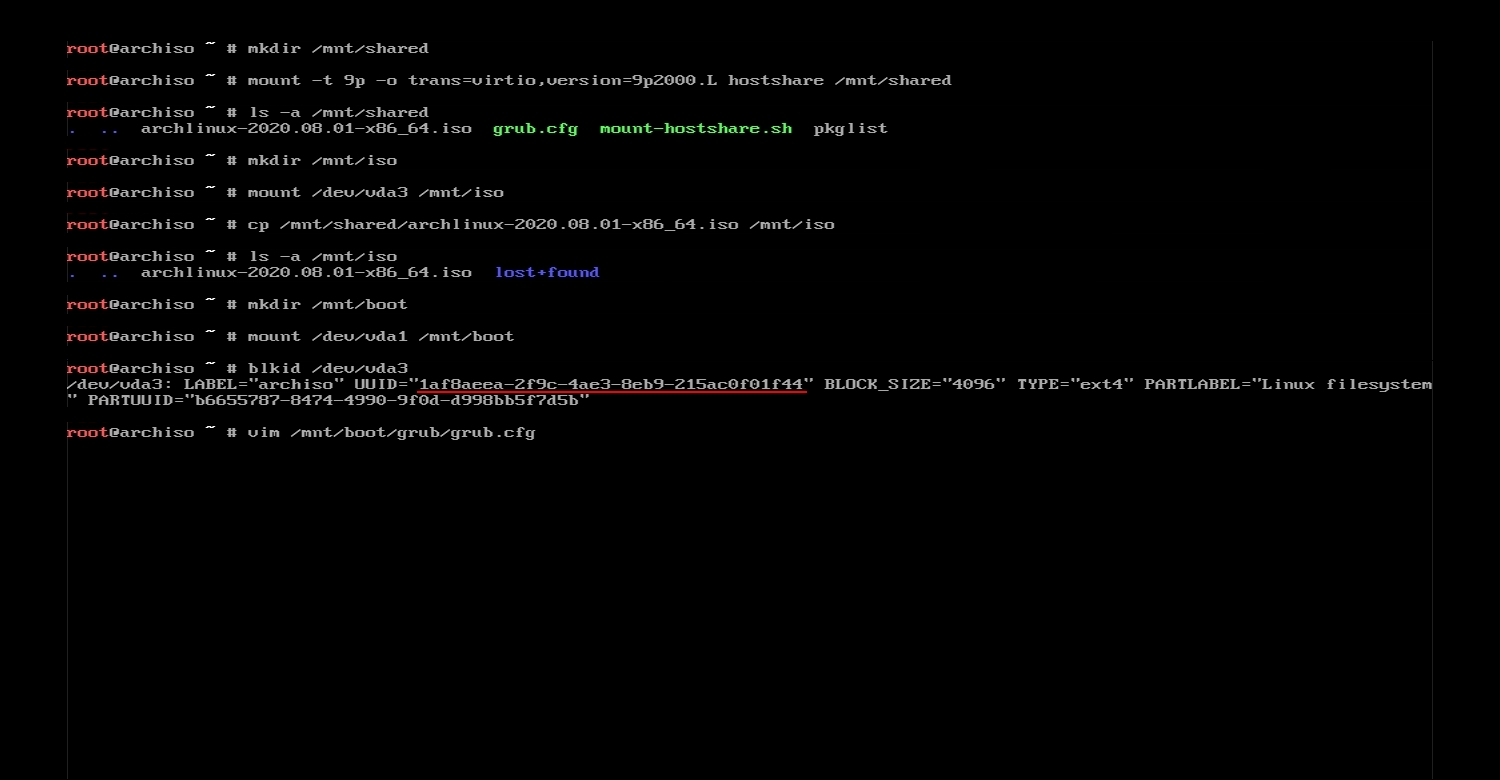
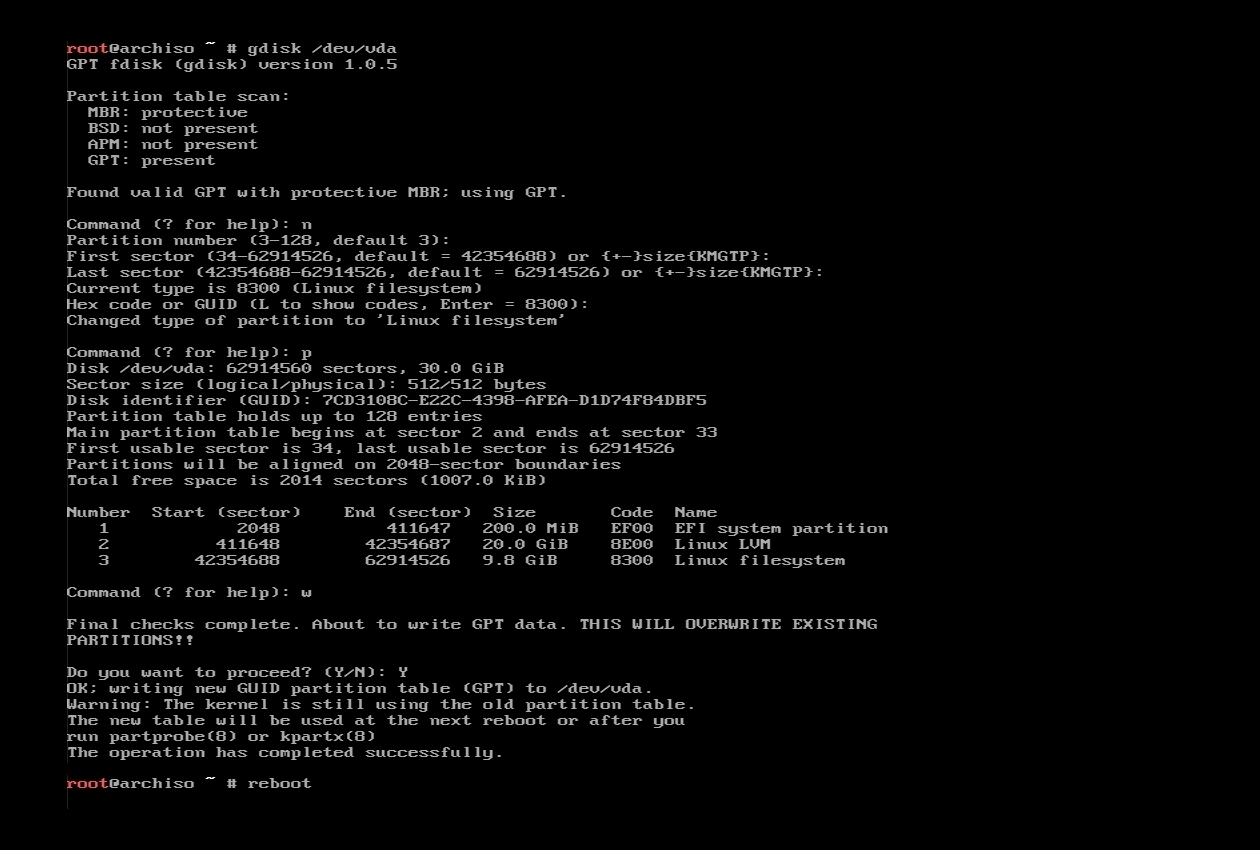
BONUS. The radio buttons below feature the complete steps I did to add a new partition with the remaining free space gained as a result of shrinking the physical partition, in the form of screenshots. This new partition parks the
archiso that I can boot into by adding a menuentry in the grub config file.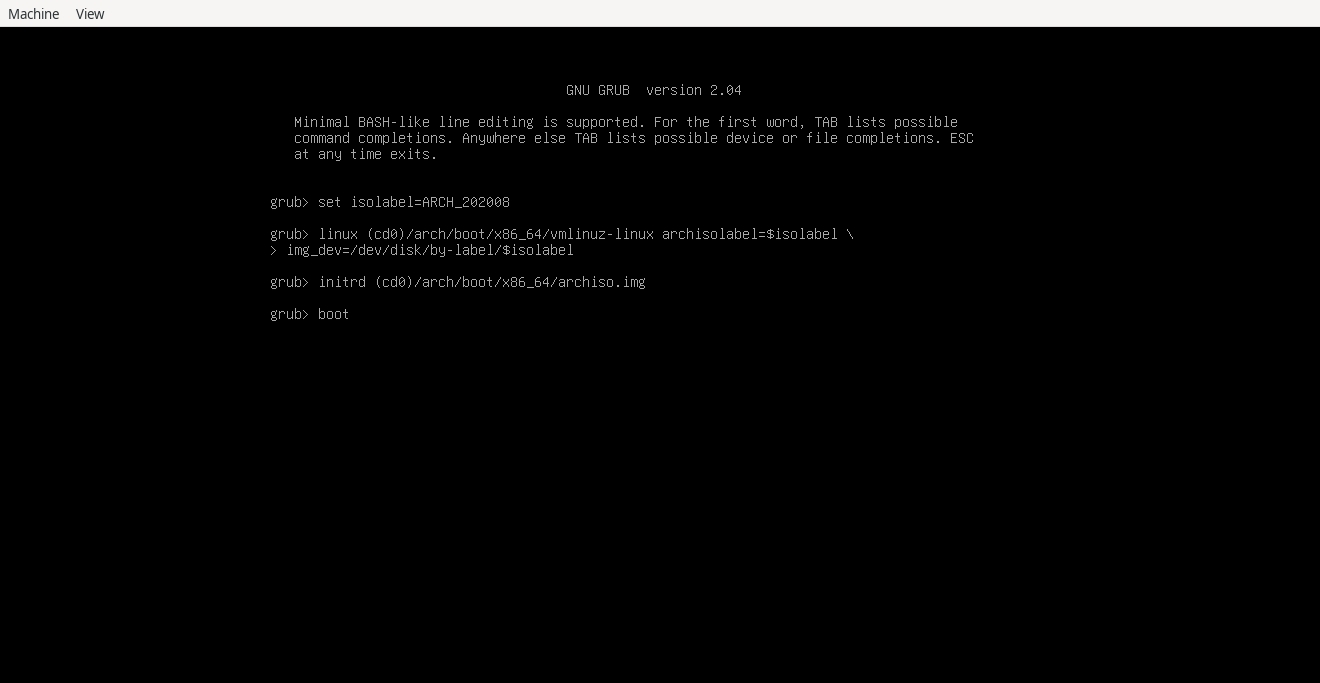
Rujukan:
Kali terakhir dikemaskini:
